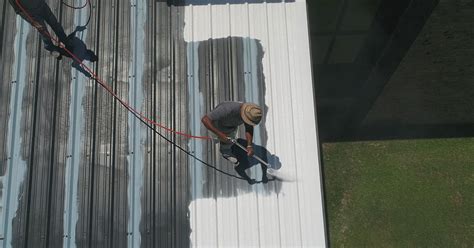
Elastomeric roof coatings have become a popular choice for building owners and homeowners looking to extend the life of their roofs while reducing energy costs and environmental impact. These coatings are highly flexible, waterproof, and can be applied to various types of roofs, including flat, sloped, and metal roofs. In this article, we will guide you through the 7 steps to apply elastomeric roof coating, ensuring a successful and long-lasting application.
Benefits of Elastomeric Roof Coatings
Before diving into the application process, it's essential to understand the benefits of elastomeric roof coatings. These coatings offer several advantages, including:
- Extended roof life: Elastomeric coatings can add 10-20 years to the life of your roof.
- Energy efficiency: They can reduce energy costs by reflecting solar rays and keeping the roof cool.
- Waterproofing: Elastomeric coatings are highly waterproof, preventing leaks and water damage.
- Durability: They are resistant to cracking, fading, and weathering.
- Environmental benefits: Elastomeric coatings are a sustainable alternative to roof replacement.
Step 1: Prepare the Roof

Before applying the elastomeric roof coating, it's crucial to prepare the roof surface. This involves:
- Cleaning the roof: Remove dirt, debris, and old coatings using a pressure washer or a cleaning solution.
- Repairing leaks: Fix any leaks or damaged areas to ensure a watertight surface.
- Applying a primer (optional): If the roof has a rough or porous surface, apply a primer to create a smooth surface for the coating.
Step 2: Choose the Right Coating

Selecting the right elastomeric roof coating is vital for a successful application. Consider factors such as:
- Roof type: Different coatings are suitable for various roof types, such as flat, sloped, or metal roofs.
- Climate: Choose a coating that can withstand the local climate conditions, including temperature, humidity, and weather patterns.
- Color: Select a coating that matches the desired color and finish.
Step 3: Apply the Coating

Apply the elastomeric roof coating according to the manufacturer's instructions. Typically, this involves:
- Applying a thin layer: Use a roller or sprayer to apply a thin, even layer of coating to the roof surface.
- Allowing it to dry: Let the coating dry completely before applying additional layers.
- Applying multiple layers: Apply multiple layers of coating, allowing each layer to dry before applying the next.
Step 4: Reinforce Roof Edges

Reinforcing the roof edges is crucial to prevent water from seeping under the coating. Use a reinforcing tape or a bead of coating to seal the edges.
Step 5: Inspect and Repair

Inspect the roof coating for any defects or areas that may require repair. Make any necessary repairs to ensure a watertight surface.
Step 6: Apply a Topcoat

Apply a topcoat to the roof coating to provide additional protection and durability. This can include a clear coat or a pigmented coat to match the desired color.
Step 7: Maintenance and Inspection

Regular maintenance and inspection are essential to ensure the longevity of the elastomeric roof coating. Inspect the roof coating annually and perform any necessary repairs or touch-ups.
Gallery of Elastomeric Roof Coatings


FAQ
What is elastomeric roof coating?
+Elastomeric roof coating is a type of roof coating that is highly flexible and waterproof, designed to extend the life of your roof.
How long does elastomeric roof coating last?
+Elastomeric roof coating can last for 10-20 years, depending on the quality of the coating and the conditions it is exposed to.
Can I apply elastomeric roof coating myself?
+While it is possible to apply elastomeric roof coating yourself, it is recommended to hire a professional to ensure a successful and long-lasting application.
We hope this article has provided you with a comprehensive guide to applying elastomeric roof coating. Remember to follow the 7 steps outlined above, and consider hiring a professional to ensure a successful application. If you have any questions or comments, please feel free to share them below.
