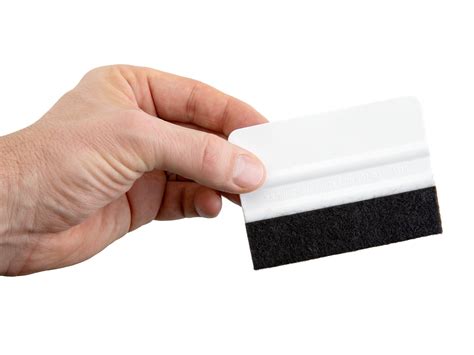
The art of applying vinyl graphics and decals has become a popular trend in the world of crafting, DIY projects, and even professional sign-making. At the heart of this process lies a crucial tool: the vinyl applicator. Mastering the use of a vinyl applicator tool is essential for achieving smooth, bubble-free, and professional-looking results. In this article, we will delve into the world of vinyl applicators, exploring their importance, benefits, and most importantly, providing 7 essential tips for mastering the art of using these tools.
What is a Vinyl Applicator Tool?
A vinyl applicator tool, also known as a squeegee or applicator, is a device used to apply vinyl graphics, decals, and signs onto various surfaces, such as cars, laptops, and walls. The tool helps to remove air bubbles, excess vinyl, and moisture, ensuring a strong bond between the vinyl and the surface.
Why is Mastering the Vinyl Applicator Tool Important?
Mastering the vinyl applicator tool is crucial for several reasons:
- Achieving professional-looking results: A well-applied vinyl graphic or decal can make a significant difference in the overall appearance of a project.
- Reducing waste and saving time: By mastering the vinyl applicator tool, you can minimize the risk of mistakes, reduce waste, and save time in the long run.
- Ensuring durability: Proper application of vinyl graphics and decals ensures a strong bond, which is essential for durability and longevity.
Tip 1: Choose the Right Vinyl Applicator Tool
With various types of vinyl applicators available, it's essential to choose the right one for your project. Consider the following factors when selecting a vinyl applicator tool:
- Material: Vinyl applicators can be made from rubber, plastic, or a combination of both. Rubber applicators are more flexible and suitable for curved surfaces, while plastic applicators are more rigid and ideal for flat surfaces.
- Size: Choose an applicator that is suitable for the size of your project. Larger applicators are ideal for bigger projects, while smaller applicators are better suited for smaller projects.
- Type: There are two main types of vinyl applicators: felt applicators and rubber applicators. Felt applicators are better suited for intricate designs and small projects, while rubber applicators are ideal for larger projects and smooth surfaces.

Tip 2: Prepare Your Surface
Before applying vinyl graphics or decals, it's essential to prepare the surface. Ensure the surface is clean, dry, and free from dust, dirt, and oils. Use a mild detergent and water to clean the surface, and dry it thoroughly with a lint-free cloth.

Tip 3: Apply the Right Amount of Pressure
Applying the right amount of pressure is crucial when using a vinyl applicator tool. Too little pressure can result in air bubbles and wrinkles, while too much pressure can cause the vinyl to stretch or tear. Apply gentle to moderate pressure, depending on the surface and the type of vinyl.

Tip 4: Use the Right Angle
The angle at which you apply the vinyl applicator tool is crucial. Hold the tool at a 45-degree angle, with the edge of the tool facing the center of the vinyl. This helps to prevent air bubbles and wrinkles.

Tip 5: Work from the Center Out
When applying vinyl graphics or decals, it's essential to work from the center out. This helps to prevent air bubbles and wrinkles, ensuring a smooth and even application.

Tip 6: Use a Squeegee or Credit Card
For intricate designs or small projects, use a squeegee or credit card to apply pressure and remove air bubbles. This helps to ensure a smooth and even application.

Tip 7: Inspect and Adjust
Finally, inspect your work and adjust as needed. Check for air bubbles, wrinkles, and excess vinyl. Make adjustments as necessary to ensure a professional-looking finish.

Gallery of Vinyl Applicator Tools


FAQ Section
What is the best type of vinyl applicator tool for beginners?
+A felt applicator is the best type of vinyl applicator tool for beginners. It is gentle on surfaces and easy to use.
How do I prevent air bubbles when applying vinyl graphics?
+To prevent air bubbles, work from the center out, use a squeegee or credit card, and apply gentle to moderate pressure.
Can I use a vinyl applicator tool on curved surfaces?
+Yes, you can use a vinyl applicator tool on curved surfaces. However, it's essential to use a rubber applicator and apply gentle pressure to avoid stretching or tearing the vinyl.
In conclusion, mastering the vinyl applicator tool is essential for achieving professional-looking results in vinyl graphics and decals. By following these 7 essential tips, you can improve your skills and become a proficient user of vinyl applicator tools. Remember to choose the right tool, prepare your surface, apply the right amount of pressure, use the right angle, work from the center out, use a squeegee or credit card, and inspect and adjust your work. With practice and patience, you can become a master of vinyl applicator tools and create stunning vinyl graphics and decals.
