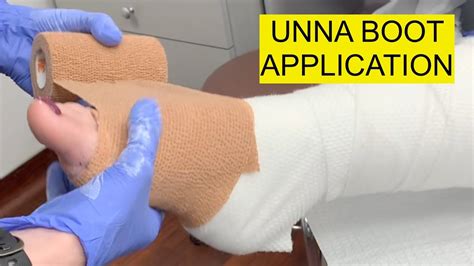
The Unna boot, a type of compression dressing, has been a staple in wound care for decades. Its unique combination of zinc oxide paste, calamine lotion, and compression bandages provides an effective way to promote healing, reduce swelling, and alleviate discomfort in patients with venous ulcers and other lower extremity wounds. However, applying an Unna boot correctly is crucial to ensure optimal results and prevent complications. In this article, we will guide you through the 7 essential steps to apply an Unna boot correctly.

Step 1: Prepare the Wound and Surrounding Skin Before applying the Unna boot, ensure the wound is clean and free of debris. Gently wash the wound with saline solution and pat it dry with a sterile gauze. Remove any existing dressings or creams, and clean the surrounding skin with soap and water. Dry the skin thoroughly, paying extra attention to the areas where the compression bandages will be applied.

Step 2: Apply a Thin Layer of Zinc Oxide Paste Using a sterile applicator, apply a thin, even layer of zinc oxide paste to the wound, extending about 1 inch beyond the wound margins. This paste helps to promote healing, reduce inflammation, and protect the wound from bacterial colonization.

Step 3: Apply a Layer of Calamine Lotion Next, apply a thin layer of calamine lotion to the zinc oxide paste, using a gentle, stroking motion. Calamine lotion helps to soothe the skin, reduce itching and discomfort, and promote a conducive environment for healing.

Step 4: Apply the First Layer of Compression Bandages Using a compression bandage, wrap the affected limb, starting at the distal end (farthest from the heart) and working your way proximally (toward the heart). Apply the bandage with a moderate level of tension, ensuring it is snug but not too tight. This layer helps to provide graduated compression, which is essential for reducing swelling and promoting blood flow.

Step 5: Apply Additional Layers of Compression Bandages Depending on the level of compression required, apply additional layers of compression bandages, overlapping each layer by about 50%. Ensure each layer is applied with the same moderate level of tension as the first layer. This will help to achieve the desired level of compression and promote optimal healing.

Step 6: Secure the Unna Boot Once all the layers of compression bandages have been applied, secure the Unna boot with medical tape or a cohesive bandage. Ensure the tape or bandage is not too tight, as this can compromise circulation and cause discomfort.

Step 7: Monitor and Adjust Finally, monitor the patient's response to the Unna boot and adjust the compression levels as needed. Regularly inspect the wound and surrounding skin for signs of complications, such as excessive swelling, pain, or skin breakdown. Adjust the Unna boot accordingly to ensure optimal healing and patient comfort.

Gallery of Unna Boot Application


By following these 7 essential steps, you can ensure the correct application of an Unna boot, promoting optimal healing and patient comfort. Remember to monitor the patient's response and adjust the compression levels as needed to achieve the best possible outcomes.
We hope this article has provided valuable insights into the application of an Unna boot. If you have any questions or comments, please feel free to share them with us. Your feedback is greatly appreciated, and we look forward to hearing from you.
What is an Unna boot?
+An Unna boot is a type of compression dressing used to promote healing and reduce swelling in patients with venous ulcers and other lower extremity wounds.
How often should the Unna boot be changed?
+The Unna boot should be changed every 7-10 days, or as directed by a healthcare professional.
Can I use an Unna boot on an open wound?
+Yes, an Unna boot can be used on an open wound, but it is essential to ensure the wound is clean and free of debris before application.
