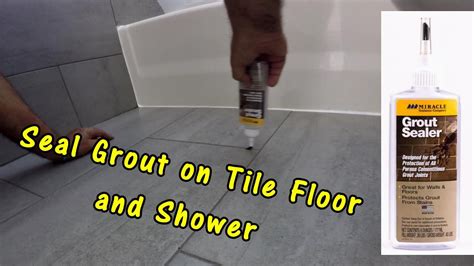
The world of tile sealant application can be a daunting one, especially for those who are new to the game. With so many different types of tile sealants and applicators on the market, it can be hard to know where to start. However, with the right tools and a bit of know-how, you can achieve professional-looking results in no time. In this article, we will explore the benefits of using a tile sealant applicator, and provide 5 valuable tips for getting the most out of this handy tool.

Benefits of Using a Tile Sealant Applicator
Before we dive into our top tips for using a tile sealant applicator, let's take a look at some of the benefits of using this tool. A tile sealant applicator is a specialized tool that is designed to make the process of applying tile sealant quick and easy. With a tile sealant applicator, you can achieve a smooth, even finish that is free from streaks and bubbles. This is especially important when working with high-gloss or polished tiles, where any imperfections can be easily visible.
Tip 1: Choose the Right Applicator for the Job
When it comes to choosing a tile sealant applicator, there are several different options to consider. The type of applicator you choose will depend on the type of tile sealant you are using, as well as the size and shape of the tiles you are working with. For example, if you are working with large format tiles, you may want to use a larger applicator to cover more surface area at once. On the other hand, if you are working with smaller tiles, a smaller applicator may be more suitable.

Tip 2: Prepare the Surface Before Application
Before you start applying tile sealant, it's essential to prepare the surface of the tiles. This includes cleaning the tiles thoroughly to remove any dirt, grime, or old sealant that may be present. You should also make sure the tiles are dry, as any moisture can affect the adhesion of the sealant.
Tip 3: Apply the Sealant in Thin, Even Coats
When applying tile sealant, it's essential to apply it in thin, even coats. This will help prevent the sealant from pooling or forming bubbles on the surface of the tiles. You should also make sure to work in small sections, applying the sealant to one section at a time. This will help you maintain even coverage and avoid any streaks or marks.

Tip 4: Use a Lambswool Applicator for Large Format Tiles
When working with large format tiles, a lambswool applicator can be a valuable tool. These applicators are designed to cover large surface areas quickly and evenly, making them ideal for big tiles. They are also great for applying sealant to textured or uneven surfaces, as the lambswool fibers can help to fill in any gaps or imperfections.
Tip 5: Allow the Sealant to Dry Completely Before Grouting
Finally, it's essential to allow the tile sealant to dry completely before grouting. This can take anywhere from a few hours to several days, depending on the type of sealant you are using and the ambient temperature and humidity. You should also make sure to follow the manufacturer's instructions for the recommended drying time, as this can vary from product to product.

Conclusion
Using a tile sealant applicator can be a great way to achieve professional-looking results in your tile installation projects. By following these 5 tips, you can ensure that your tile sealant is applied evenly and effectively, providing long-lasting protection for your tiles. Whether you are a seasoned pro or just starting out, a tile sealant applicator is a valuable tool to have in your arsenal.


What is a tile sealant applicator?
+A tile sealant applicator is a specialized tool designed to apply tile sealant evenly and effectively.
How do I choose the right tile sealant applicator for my project?
+Choose a tile sealant applicator that is suitable for the type of tile sealant you are using and the size and shape of the tiles you are working with.
How long does it take for tile sealant to dry?
+The drying time for tile sealant can vary depending on the type of sealant and the ambient temperature and humidity. Always follow the manufacturer's instructions for the recommended drying time.
