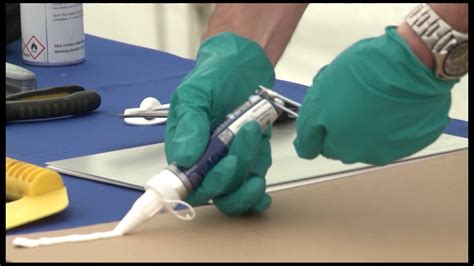
Sealant applicators have become an essential tool in various industries, including construction, automotive, and DIY projects. These applicators make it easier to apply sealants, adhesives, and other materials to surfaces, ensuring a strong bond and a professional finish. However, using a sealant applicator effectively requires some knowledge and practice. In this article, we will discuss five essential tips for using a sealant applicator, ensuring you get the best results from your projects.

Tip 1: Choose the Right Sealant Applicator
With so many types of sealant applicators available, choosing the right one can be overwhelming. The key is to select an applicator that suits your specific needs and the type of sealant you are using. Consider the following factors when choosing a sealant applicator:
- The size of the nozzle: A smaller nozzle is ideal for precision work, while a larger nozzle is better suited for larger projects.
- The type of sealant: Different sealants require different applicators. For example, a pneumatic applicator is best for thick, high-viscosity sealants, while a manual applicator is better suited for thinner sealants.
- The material of the applicator: Applicators made from high-quality materials, such as stainless steel or plastic, are more durable and resistant to corrosion.
Types of Sealant Applicators
- Manual applicators: These are the most common type of applicator and are suitable for most DIY projects.
- Pneumatic applicators: These are ideal for large-scale projects and are often used in industrial settings.
- Electric applicators: These are similar to pneumatic applicators but are powered by electricity instead of compressed air.

Tip 2: Prepare the Surface
Before applying sealant, it's essential to prepare the surface. This includes cleaning the surface, removing any dirt, dust, or debris, and ensuring it's dry. A clean and dry surface ensures a strong bond between the sealant and the surface.
Cleaning the Surface
- Use a wire brush or sandpaper to remove any dirt, dust, or debris from the surface.
- Wipe the surface with a clean cloth or paper towel to remove any remaining dirt or dust.
- Use a solvent or cleaner to remove any oils or greases from the surface.

Tip 3: Apply the Sealant Correctly
Applying the sealant correctly is crucial for achieving a strong bond and a professional finish. Here are some tips for applying sealant correctly:
- Hold the applicator at a 45-degree angle to ensure the sealant flows smoothly and evenly.
- Apply the sealant in a continuous, steady motion, starting from one end of the surface and working your way down.
- Use a consistent amount of pressure to ensure the sealant is applied evenly.
Common Mistakes to Avoid
- Applying too much sealant, which can lead to a mess and a weak bond.
- Applying too little sealant, which can lead to a weak bond and a poor finish.
- Applying sealant in a stop-start motion, which can lead to a weak bond and a poor finish.

Tip 4: Use the Right Amount of Pressure
Using the right amount of pressure is essential for achieving a strong bond and a professional finish. Too much pressure can lead to a mess and a weak bond, while too little pressure can lead to a weak bond and a poor finish.
How to Apply the Right Amount of Pressure
- Use a consistent amount of pressure throughout the application process.
- Apply gentle pressure for thin sealants and more pressure for thicker sealants.
- Use a pressure gauge or a pressure-sensitive applicator to ensure the right amount of pressure is applied.

Tip 5: Clean Up Excess Sealant
Cleaning up excess sealant is essential for achieving a professional finish and preventing mess. Here are some tips for cleaning up excess sealant:
- Use a clean cloth or paper towel to wipe away excess sealant.
- Use a solvent or cleaner to remove any remaining sealant from the surface.
- Use a sealant remover or a cleaning solution specifically designed for the type of sealant you are using.
Common Mistakes to Avoid
- Leaving excess sealant on the surface, which can lead to a mess and a weak bond.
- Using the wrong cleaning solution, which can damage the surface or the sealant.

By following these five essential tips for using a sealant applicator, you can ensure a strong bond and a professional finish for your projects. Remember to choose the right sealant applicator, prepare the surface, apply the sealant correctly, use the right amount of pressure, and clean up excess sealant.


What is the best type of sealant applicator for my project?
+The best type of sealant applicator for your project depends on the type of sealant you are using and the size of the project. Manual applicators are suitable for most DIY projects, while pneumatic applicators are ideal for large-scale projects.
How do I clean up excess sealant?
+Use a clean cloth or paper towel to wipe away excess sealant. Use a solvent or cleaner to remove any remaining sealant from the surface. Use a sealant remover or a cleaning solution specifically designed for the type of sealant you are using.
What is the best way to apply sealant?
+Hold the applicator at a 45-degree angle and apply the sealant in a continuous, steady motion. Use a consistent amount of pressure to ensure the sealant is applied evenly.
