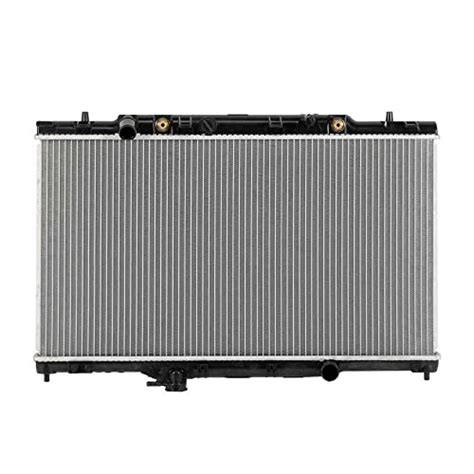
The Honda CR-V is a reliable and popular SUV that has been on the market for decades. However, like any vehicle, it requires regular maintenance to ensure it runs smoothly and efficiently. One crucial component that needs attention is the radiator, which plays a vital role in cooling the engine. If your 2004 Honda CR-V is experiencing issues with its radiator, it may be time for a replacement. In this article, we'll guide you through the process of replacing the radiator in your 2004 Honda CR-V.
The Importance of a Functional Radiator
Before we dive into the replacement process, let's understand the importance of a functional radiator. The radiator is responsible for dissipating heat generated by the engine, which helps maintain a safe operating temperature. If the radiator is faulty or damaged, the engine can overheat, leading to costly repairs, reduced performance, and potentially even engine failure.

Symptoms of a Failing Radiator
So, how do you know if your 2004 Honda CR-V's radiator needs to be replaced? Here are some common symptoms to look out for:
- Leaks or water droplets under the hood or on the ground
- Overheating engine, indicated by a rising temperature gauge or warning lights on the dashboard
- Coolant loss or low coolant levels
- White smoke or steam emanating from the hood or exhaust pipe
- Unusual noises or rattling sounds coming from the radiator
If you've noticed any of these symptoms, it's essential to address the issue promptly to prevent further damage to your engine.
Preparing for Radiator Replacement
Before starting the replacement process, make sure you have the following:
- A new radiator specifically designed for your 2004 Honda CR-V
- A radiator hose kit, which includes new hoses and clamps
- Coolant (preferably a 50/50 mix of antifreeze and water)
- A drain pan or container to catch spilled coolant
- Safety glasses, gloves, and a face mask
- A socket wrench or ratchet and socket set
It's also recommended to consult your owner's manual or a repair manual for specific instructions and precautions.
Step-by-Step Radiator Replacement Guide
Here's a step-by-step guide to help you replace the radiator in your 2004 Honda CR-V:
- Drain the Coolant: Locate the radiator drain valve, usually found at the bottom of the radiator. Use a socket wrench or ratchet and socket to loosen the valve, then allow the coolant to drain into a pan or container. Be cautious, as the coolant can be hot and may spill.
- Remove the Radiator Hose: Use a wrench or pliers to loosen the hose clamp, then pull the hose off the radiator inlet.
- Disconnect the Fan Switch: Unplug the fan switch electrical connector, then remove the screw holding the fan switch in place. Gently pull the fan switch away from the radiator.
- Remove the Upper Radiator Hose: Repeat the process from step 2 to remove the upper radiator hose.
- Remove the Radiator Mounting Brackets: Use a socket wrench or ratchet and socket to remove the screws holding the radiator mounting brackets in place. Gently pull the brackets away from the radiator.
- Remove the Radiator: With the brackets and hoses removed, carefully lift the radiator out of the engine compartment.
- Install the New Radiator: Place the new radiator in the engine compartment, ensuring it's securely seated and the mounting brackets are aligned.
- Reinstall the Radiator Mounting Brackets: Use the socket wrench or ratchet and socket to reinstall the screws holding the radiator mounting brackets in place.
- Reconnect the Fan Switch: Plug the fan switch electrical connector back in, then reattach the fan switch to the radiator using the screw.
- Reinstall the Upper Radiator Hose: Slide the upper radiator hose back onto the radiator inlet, then tighten the hose clamp using a wrench or pliers.
- Reconnect the Radiator Hose: Repeat the process from step 2 to reconnect the radiator hose.
- Refill the Coolant: Fill the radiator with a 50/50 mix of antifreeze and water, then replace the radiator cap.

Tips and Precautions
- Make sure to handle the new radiator with care, as it can be damaged easily.
- Use a torque wrench to tighten the radiator mounting bracket screws to the recommended specification.
- Avoid over-tightening the hose clamps, as this can damage the hoses or radiator.
- If you're not comfortable with this replacement, consider consulting a professional mechanic.
Conclusion
Replacing the radiator in your 2004 Honda CR-V can seem daunting, but with the right tools and a bit of patience, it's a manageable task. By following this guide, you'll be able to replace the radiator and get your vehicle running smoothly and efficiently. Remember to always follow safety precautions and consult your owner's manual or a repair manual for specific instructions and precautions.
Gallery of Radiator Replacement Images


FAQ Section
What are the symptoms of a failing radiator?
+Symptoms of a failing radiator include leaks or water droplets under the hood or on the ground, overheating engine, coolant loss or low coolant levels, white smoke or steam emanating from the hood or exhaust pipe, and unusual noises or rattling sounds coming from the radiator.
How do I drain the coolant from my 2004 Honda CR-V?
+To drain the coolant, locate the radiator drain valve, usually found at the bottom of the radiator. Use a socket wrench or ratchet and socket to loosen the valve, then allow the coolant to drain into a pan or container.
Can I replace the radiator myself?
+Yes, you can replace the radiator yourself, but it's recommended to consult a professional mechanic if you're not comfortable with the process.
