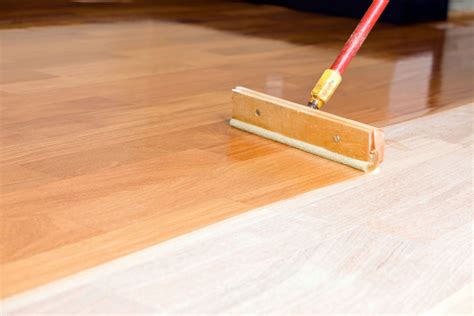
When it comes to applying polyurethane to a surface, having the right tools can make all the difference. A polyurethane applicator is a game-changer for any DIY enthusiast or professional looking to achieve a smooth, even finish. But, with so many options available, it can be overwhelming to know where to start. In this article, we'll explore the different types of polyurethane applicators and provide tips on how to use them effectively.
Using a polyurethane applicator can seem intimidating, especially for those new to DIY projects. However, with a little practice and patience, you can achieve professional-looking results. In this article, we'll delve into the world of polyurethane applicators and provide you with the knowledge and confidence to tackle your next project.
What is a Polyurethane Applicator?
A polyurethane applicator is a tool used to apply a thin, even layer of polyurethane to a surface. It's typically a foam or microfiber pad attached to a handle, making it easy to maneuver and control. Polyurethane applicators come in different sizes and shapes, each designed for specific tasks and surfaces.
Types of Polyurethane Applicators
Before we dive into the tips and tricks, let's take a look at the different types of polyurethane applicators available:
- Foam applicators: These are the most common type and are suitable for most projects. They're inexpensive and easy to use.
- Microfiber applicators: These are ideal for smooth surfaces and provide a high-gloss finish.
- Lambswool applicators: These are perfect for large surfaces and provide a smooth, even finish.

5 Ways to Use a Polyurethane Applicator Effectively
Now that we've covered the basics, let's move on to the tips and tricks. Here are 5 ways to use a polyurethane applicator effectively:
1. Prepare Your Surface
Before applying polyurethane, make sure your surface is clean and dry. Any dust, dirt, or moisture can affect the finish and cause the polyurethane to peel or flake off.

2. Choose the Right Applicator
Select an applicator that's suitable for your project. For example, if you're working with a large surface, a lambswool applicator may be the best choice.

3. Apply Thin Coats
Apply thin coats of polyurethane, allowing each coat to dry before applying the next. This will help prevent the polyurethane from pooling or running.

4. Work in Small Sections
Divide your surface into small sections and complete each one at a time. This will help you maintain even coverage and prevent the polyurethane from drying out.

5. Inspect and Repeat
Inspect your surface after each coat and repeat the process until you achieve the desired finish.

Conclusion
Using a polyurethane applicator effectively requires patience, practice, and the right techniques. By following these 5 tips, you'll be able to achieve a smooth, even finish and take your DIY projects to the next level.


What is the best type of polyurethane applicator for a large surface?
+A lambswool applicator is the best choice for large surfaces as it provides a smooth, even finish.
How many coats of polyurethane should I apply?
+The number of coats depends on the desired finish and surface. Typically, 2-3 coats are sufficient.
What is the best way to clean a polyurethane applicator?
+Wash the applicator with soap and water, and allow it to air dry.
