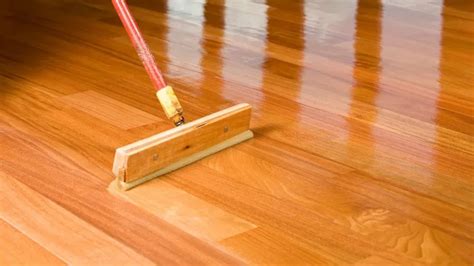
Using a poly floor applicator can be a daunting task, especially for those who are new to floor finishing. However, with the right techniques and tips, you can achieve a professional-looking finish that will last for years to come.

In this article, we will share 7 tips for using a poly floor applicator to help you get the best results possible.
Tip 1: Prepare the Floor Properly
Before applying polyurethane to your floor, it's essential to prepare the surface properly. This includes cleaning the floor thoroughly, filling any gaps or cracks, and sanding the surface to create a smooth finish. Any imperfections in the floor can affect the final result, so take the time to get it right.

Tip 2: Choose the Right Polyurethane
Not all polyurethanes are created equal. When selecting a polyurethane for your floor, consider the type of finish you want to achieve, the level of durability required, and the color of the finish. Water-based polyurethanes are a popular choice for their ease of use and low odor, while oil-based polyurethanes provide a harder, more durable finish.

Tip 3: Apply Thin Coats
When applying polyurethane to your floor, it's essential to apply thin coats to avoid drips and unevenness. Start by applying a thin coat to a small test area to ensure the polyurethane is flowing smoothly from the applicator. Then, apply the polyurethane in sections, working your way across the floor in a steady, consistent motion.

Tip 4: Work in Small Sections
To achieve a professional-looking finish, it's essential to work in small sections. Divide the floor into smaller areas, such as 4' x 4' sections, and complete each section at a time. This will help you maintain even coverage and avoid overlapping or missed spots.

Tip 5: Use a Lambswool Applicator
A lambswool applicator is a specialized tool designed specifically for applying polyurethane to floors. The lambswool fibers are gentle on the floor and help to create a smooth, even finish. When using a lambswool applicator, be sure to work in small sections and apply the polyurethane in a steady, consistent motion.

Tip 6: Avoid Over-Application
One of the most common mistakes when using a poly floor applicator is over-application. Too much polyurethane can lead to drips, unevenness, and a finish that is too thick. To avoid this, start with a thin coat and build up gradually, allowing each coat to dry before applying the next.

Tip 7: Allow Adequate Drying Time
Finally, it's essential to allow adequate drying time between coats of polyurethane. The drying time will depend on the type of polyurethane you are using, as well as the temperature and humidity of the environment. Be sure to follow the manufacturer's instructions for drying time and avoid applying additional coats too soon.

By following these 7 tips for using a poly floor applicator, you can achieve a professional-looking finish that will last for years to come.
Gallery of Poly Floor Applicator Images


What is a poly floor applicator?
+A poly floor applicator is a specialized tool designed for applying polyurethane to floors.
How do I choose the right polyurethane for my floor?
+Consider the type of finish you want to achieve, the level of durability required, and the color of the finish.
How long does polyurethane take to dry?
+The drying time will depend on the type of polyurethane you are using, as well as the temperature and humidity of the environment.
We hope this article has provided you with valuable tips and insights for using a poly floor applicator. Remember to prepare the floor properly, choose the right polyurethane, apply thin coats, work in small sections, use a lambswool applicator, avoid over-application, and allow adequate drying time. By following these tips, you can achieve a professional-looking finish that will last for years to come.
