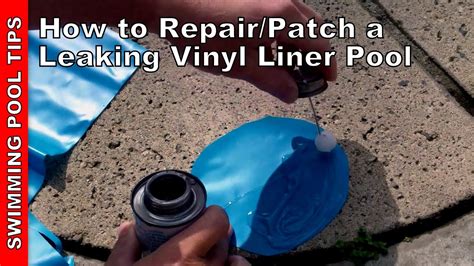
Patching a pool liner can seem like a daunting task, but with the right tools and techniques, it can be done quickly and efficiently. In this article, we'll take you through the step-by-step process of patching a pool liner like a pro in minutes.
Why Patch a Pool Liner?
Before we dive into the process, let's talk about why patching a pool liner is important. A damaged pool liner can lead to water leaks, which can cause a range of problems, including:
- Water loss: A leaky pool liner can cause you to lose hundreds of gallons of water per day, which can be costly to replace.
- Damage to surrounding areas: Water leaks can damage the surrounding areas, including the pool deck, landscaping, and nearby structures.
- Reduced pool performance: A damaged pool liner can reduce the performance of your pool, making it less efficient and more difficult to maintain.
Tools and Materials Needed
To patch a pool liner, you'll need the following tools and materials:
- Pool liner patch kit
- Liner patch adhesive
- Liner patch material (available in various sizes and shapes)
- Utility knife or scissors
- Cleaning solution (such as soap and water)
- Drying towel
- Measuring tape
- Pencil or marker

Step 1: Prepare the Area
Before you start patching, you'll need to prepare the area around the damaged liner. This includes:
- Cleaning the area with soap and water to remove any dirt or debris
- Drying the area completely with a towel
- Marking the area with a pencil or marker to define the boundaries of the patch
Step 2: Measure and Cut the Patch
Next, you'll need to measure and cut the patch to fit the damaged area. To do this:
- Measure the length and width of the damaged area
- Cut the patch material to size using a utility knife or scissors
- Make sure to leave a little extra material around the edges to ensure a secure fit

Step 3: Apply the Adhesive
Once you have your patch cut to size, you'll need to apply the adhesive to the back of the patch. To do this:
- Follow the instructions on the adhesive packaging to apply the correct amount
- Apply the adhesive evenly to the back of the patch, making sure to cover the entire area
Step 4: Apply the Patch
Now it's time to apply the patch to the damaged area. To do this:
- Place the patch over the damaged area, making sure to align it with the markings you made earlier
- Press the patch firmly onto the liner, making sure to apply even pressure
- Use a roller or other tool to remove any air bubbles that may form

Step 5: Inspect and Test
Once the patch is applied, you'll need to inspect and test the area to make sure it's secure. To do this:
- Inspect the patch for any signs of leakage or damage
- Test the patch by applying pressure to the area
Gallery of Pool Liner Patching:


Conclusion
Patching a pool liner is a relatively simple process that can be done in minutes with the right tools and techniques. By following the steps outlined in this article, you can ensure a secure and long-lasting patch that will keep your pool running smoothly. Remember to always follow the manufacturer's instructions for the patch kit and adhesive, and to test the patch thoroughly before returning to normal use.
Frequently Asked Questions
What is the best way to patch a pool liner?
+The best way to patch a pool liner is to use a pool liner patch kit, which includes a patch material and adhesive specifically designed for pool liners. Follow the manufacturer's instructions for application and testing.
How long does it take to patch a pool liner?
+Patching a pool liner can take anywhere from a few minutes to an hour, depending on the size of the patch and the complexity of the repair.
