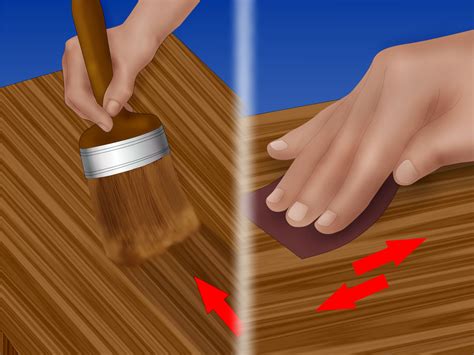
Applying polyurethane with a pad applicator is a great way to achieve a smooth, even finish on your woodworking projects. Polyurethane is a popular wood finish that provides a hard, protective coating that resists scratches and spills. In this article, we will explore five ways to apply polyurethane with a pad applicator, including the benefits of using a pad applicator, preparation steps, application techniques, and tips for achieving a professional-looking finish.
What is a Pad Applicator?
A pad applicator is a tool used to apply polyurethane and other wood finishes to a surface. It consists of a flat, rectangular pad with a handle attached to it. The pad is typically made of a soft, absorbent material, such as foam or cloth, that is designed to hold a generous amount of polyurethane. Pad applicators are available in various sizes, ranging from small, handheld pads to large, floor-standing models.
Benefits of Using a Pad Applicator
Using a pad applicator to apply polyurethane offers several benefits, including:
- Smooth, even finish: Pad applicators are designed to apply polyurethane evenly and smoothly, eliminating the risk of streaks and runs.
- Easy to use: Pad applicators are simple to operate, making them perfect for beginners and experienced woodworkers alike.
- Fast application: Pad applicators allow you to apply polyurethane quickly and efficiently, saving you time and effort.
- Reduced waste: Pad applicators help minimize waste by applying the exact amount of polyurethane needed, reducing the risk of over-application.

Preparation Steps
Before applying polyurethane with a pad applicator, make sure to:
- Sand the surface: Sand the wood surface to create a smooth, even finish.
- Clean the surface: Wipe the surface clean with a tack cloth or a damp cloth to remove any dust, dirt, or debris.
- Apply a wood conditioner: If necessary, apply a wood conditioner to the surface to enhance the color and grain of the wood.
- Choose the right polyurethane: Select a polyurethane that is suitable for your woodworking project, taking into account the type of wood, the desired finish, and the level of protection needed.
5 Ways to Apply Polyurethane with a Pad Applicator
Here are five ways to apply polyurethane with a pad applicator:
1. Basic Application Technique
This is the most common way to apply polyurethane with a pad applicator. Simply:
- Dip the pad into the polyurethane and wring it out thoroughly to remove any excess.
- Apply the polyurethane to the surface in smooth, even strokes, working in small sections.
- Use a clean, dry cloth to wipe away any excess polyurethane and prevent drips.

2. Cross-Hatch Application Technique
This technique involves applying polyurethane in a cross-hatch pattern to create a strong, durable finish. To do this:
- Dip the pad into the polyurethane and wring it out thoroughly to remove any excess.
- Apply the polyurethane to the surface in a series of horizontal strokes, working in small sections.
- Immediately apply a series of vertical strokes, perpendicular to the horizontal strokes.
- Use a clean, dry cloth to wipe away any excess polyurethane and prevent drips.

3. Circular Motion Application Technique
This technique involves applying polyurethane in a circular motion to create a smooth, even finish. To do this:
- Dip the pad into the polyurethane and wring it out thoroughly to remove any excess.
- Apply the polyurethane to the surface in a circular motion, working in small sections.
- Use a clean, dry cloth to wipe away any excess polyurethane and prevent drips.

4. Edge Application Technique
This technique involves applying polyurethane to the edges of a surface to create a strong, durable finish. To do this:
- Dip the pad into the polyurethane and wring it out thoroughly to remove any excess.
- Apply the polyurethane to the edges of the surface, working in small sections.
- Use a clean, dry cloth to wipe away any excess polyurethane and prevent drips.

5. Overlap Application Technique
This technique involves applying polyurethane in overlapping strokes to create a strong, durable finish. To do this:
- Dip the pad into the polyurethane and wring it out thoroughly to remove any excess.
- Apply the polyurethane to the surface in overlapping strokes, working in small sections.
- Use a clean, dry cloth to wipe away any excess polyurethane and prevent drips.

Tips and Tricks
Here are some tips and tricks to help you achieve a professional-looking finish when applying polyurethane with a pad applicator:
- Work in small sections: Divide the surface into small sections and complete each one at a time to prevent drips and runs.
- Use a clean, dry cloth: Use a clean, dry cloth to wipe away any excess polyurethane and prevent drips.
- Apply thin coats: Apply thin coats of polyurethane, allowing each coat to dry before applying the next one.
- Avoid over-application: Avoid applying too much polyurethane, as this can create a thick, uneven finish.


FAQs
What is the best way to apply polyurethane with a pad applicator?
+The best way to apply polyurethane with a pad applicator is to use a combination of the basic application technique and the cross-hatch application technique.
How many coats of polyurethane should I apply?
+The number of coats of polyurethane you should apply depends on the type of wood and the desired finish. Generally, two to three coats are sufficient.
What is the difference between a water-based polyurethane and an oil-based polyurethane?
+Water-based polyurethane is a water-based finish that is easy to clean up and dries quickly. Oil-based polyurethane is a solvent-based finish that provides a harder, more durable finish.
By following these tips and techniques, you can achieve a professional-looking finish when applying polyurethane with a pad applicator. Remember to always follow safety precautions and use a clean, dry cloth to wipe away any excess polyurethane.
