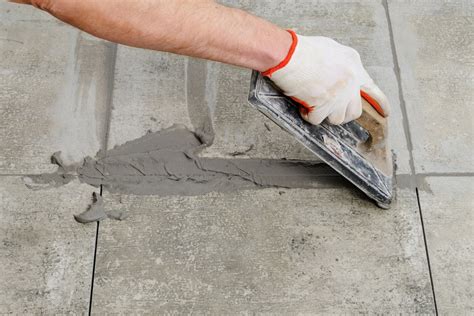
The art of grouting is a crucial step in achieving a beautiful and professional-looking tile installation. While it may seem like a simple process, applying grout requires a bit of finesse and the right tools to get the job done correctly. In this article, we will discuss the essential tools you'll need to achieve perfect grout application.
The Importance of Proper Grouting
Proper grouting is essential to prevent water from seeping behind the tiles and to create a uniform and attractive appearance. When done correctly, grouting can add a touch of elegance to any room, making it a key aspect of tile installation. However, when done poorly, it can lead to a messy and uninviting space.

1. Grout Float
A grout float is a rectangular tool used to spread and smooth out the grout between the tiles. It's typically made of rubber or foam and has a flat surface that allows for easy gliding across the tiles. The grout float is used to press the grout firmly into the gaps between the tiles, ensuring a strong bond and a smooth finish.

2. Grout Saw
A grout saw is a small, handheld tool used to remove old or excess grout from between the tiles. It's typically made of a metal or plastic blade with a handle attached to it. The grout saw is used to carefully scrape away the old grout, making way for new grout to be applied.

3. Grout Bucket
A grout bucket is a container used to mix and hold the grout. It's typically made of plastic or metal and has a handle attached to it. The grout bucket is used to mix the grout according to the manufacturer's instructions and to hold the grout while it's being applied.

4. Grout Sponge
A grout sponge is a tool used to remove excess grout from the surface of the tiles. It's typically made of a porous material that absorbs the excess grout, leaving a clean and smooth surface. The grout sponge is used to wipe away the excess grout, creating a uniform and attractive appearance.

5. Grout Sealer (Optional)
A grout sealer is a chemical solution used to protect the grout from stains and water damage. It's typically applied after the grout has dried and cured. The grout sealer creates a barrier that prevents liquids from penetrating the grout, making it easier to clean and maintain.

Additional Tips for Perfect Grout Application
- Always follow the manufacturer's instructions for mixing and applying the grout.
- Use a grout float to spread and smooth out the grout, working in small sections at a time.
- Use a grout sponge to remove excess grout from the surface of the tiles.
- Allow the grout to dry and cure according to the manufacturer's instructions.
- Consider applying a grout sealer to protect the grout from stains and water damage.
Gallery of Grouting Tools and Techniques


What is the best way to mix grout?
+The best way to mix grout is to follow the manufacturer's instructions. Typically, you'll need to mix the grout powder with water in a bucket, stirring until the mixture is smooth and free of lumps.
How long does grout take to dry?
+The drying time for grout can vary depending on the type of grout and the environmental conditions. Typically, grout takes anywhere from 15 minutes to several hours to dry.
Can I use a grout sealer on all types of grout?
+No, not all grout sealers are suitable for all types of grout. Be sure to check the manufacturer's instructions to ensure compatibility.
We hope this article has provided you with the essential tools and tips for perfect grout application. Remember to always follow the manufacturer's instructions and take your time when applying the grout. With practice and patience, you'll be able to achieve a beautiful and professional-looking tile installation.
