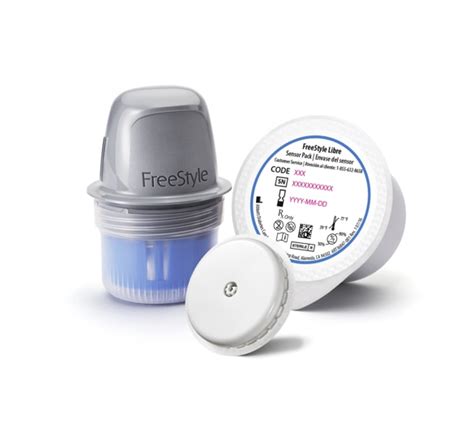
The Freestyle Libre sensor applicator is a crucial tool for individuals with diabetes who rely on continuous glucose monitoring systems. However, it's not uncommon for users to experience issues with the applicator, particularly when it comes to stuck sensors. In this article, we'll explore the common causes of stuck Freestyle Libre sensors and provide easy fix solutions to help you get back on track.
Understanding the Freestyle Libre Sensor Applicator

The Freestyle Libre sensor applicator is designed to simplify the process of applying the sensor to your skin. The applicator is pre-loaded with a sensor and features a spring-loaded mechanism that helps to insert the sensor at the correct depth. However, like any medical device, the applicator can be prone to errors, especially if not used correctly.
Common Causes of Stuck Freestyle Libre Sensors
Before we dive into the solutions, it's essential to understand the common causes of stuck Freestyle Libre sensors. Some of the most common reasons include:
- Improper insertion technique
- Insufficient skin preparation
- Sensor damage during application
- User error, such as pressing the applicator too hard or at an angle
Troubleshooting and Fixing Stuck Freestyle Libre Sensors

If you're experiencing issues with a stuck Freestyle Libre sensor, don't panic! Here are some easy fix solutions to help you resolve the problem:
1. Check the Applicator for Damage
Before attempting to fix the stuck sensor, inspect the applicator for any visible damage. If the applicator is damaged, it may be necessary to replace it with a new one.
2. Clean the Skin Area
Ensure the skin area where the sensor is stuck is clean and free of any debris. Gently wipe the area with a damp cloth and allow it to dry completely before attempting to remove the sensor.
3. Use the Correct Removal Technique
To remove a stuck Freestyle Libre sensor, follow these steps:
- Locate the sensor's edge and gently grasp it with your fingers or a pair of tweezers.
- Slowly and carefully pull the sensor away from the skin at a 90-degree angle.
- Avoid pulling the sensor at an angle or using excessive force, as this can cause further damage.
4. Apply Warm Compresses
Applying warm compresses to the affected area can help loosen the adhesive and make it easier to remove the sensor. Soak a cloth in warm water, wring it out, and apply it to the skin for a few minutes.
5. Use Adhesive Remover
If the sensor is still stuck, try using an adhesive remover specifically designed for medical devices. Apply a small amount of remover to the affected area and gently massage it in. Be cautious not to push too hard, as this can cause skin irritation.
Preventing Stuck Freestyle Libre Sensors

To minimize the risk of stuck Freestyle Libre sensors, follow these preventive measures:
- Always follow the manufacturer's instructions for applying and removing the sensor.
- Ensure the skin area is clean and dry before applying the sensor.
- Use the correct insertion technique, applying gentle pressure and avoiding angles.
- Regularly inspect the applicator for damage and replace it if necessary.
Conclusion
A stuck Freestyle Libre sensor can be frustrating, but with the right techniques and tools, it's easy to resolve the issue. By understanding the common causes of stuck sensors and following the easy fix solutions outlined in this article, you can get back to monitoring your glucose levels with confidence.
Gallery of Freestyle Libre Sensor Applicator Images


What is the most common cause of stuck Freestyle Libre sensors?
+The most common cause of stuck Freestyle Libre sensors is improper insertion technique, such as applying too much pressure or inserting the sensor at an angle.
How can I prevent stuck Freestyle Libre sensors?
+To prevent stuck Freestyle Libre sensors, ensure the skin area is clean and dry, use the correct insertion technique, and regularly inspect the applicator for damage.
Can I reuse a Freestyle Libre sensor?
+No, Freestyle Libre sensors are designed for single use only and should not be reused.
