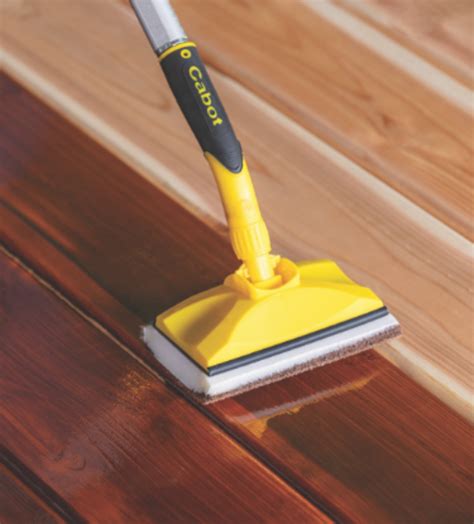
Floor staining can elevate the look and feel of any room, adding warmth and character to a space. However, achieving professional-looking results requires more than just a good eye for color. The application process itself is crucial, and using the right tools, such as a floor stain applicator, can make all the difference. In this article, we will explore the best practices for using a floor stain applicator to achieve beautiful, long-lasting results.
Why Use a Floor Stain Applicator?
Before we dive into the best practices, let's quickly discuss why using a floor stain applicator is important. A floor stain applicator is a tool designed specifically for applying stain to floors, typically consisting of a handle with a padded or lambswool head. This tool allows for even, controlled application of stain, reducing the risk of mistakes and ensuring a professional-looking finish.

Best Practice 1: Prepare the Floor
Before applying stain, it's essential to prepare the floor properly. This includes sweeping and mopping the floor to remove dirt, dust, and other debris. Any old finish or sealant should also be removed, and the floor should be sanded to create a smooth surface. This ensures the stain adheres evenly and helps prevent any imperfections.
Best Practice 2: Choose the Right Stain
Not all stains are created equal, and choosing the right one for your project is crucial. Consider the type of wood, the color you want to achieve, and the level of durability you need. Oil-based stains are great for hardwood floors, while water-based stains are better suited for softwood floors. Always read the instructions and follow the manufacturer's recommendations.

Best Practice 3: Apply the Stain in Thin Coats
Applying stain in thin coats is essential for achieving even color and preventing pooling. Work in small sections, applying the stain in a consistent, overlapping pattern. Use the floor stain applicator to spread the stain evenly, working in the direction of the wood grain. Allow each coat to dry according to the manufacturer's instructions before applying additional coats.
Best Practice 4: Work in Small Sections
Divide the floor into small sections, and complete each one at a time. This helps prevent the stain from drying out before you have a chance to spread it evenly. Work in a consistent pattern, applying the stain in thin coats and allowing each coat to dry before moving on to the next section.

Best Practice 5: Maintain the Floor Stain Applicator
Finally, it's essential to maintain the floor stain applicator to ensure it continues to perform well. After each use, clean the applicator with soap and water, and allow it to dry thoroughly. Store the applicator in a dry, protected area to prevent damage.

By following these best practices, you can achieve professional-looking results with your floor stain applicator. Remember to prepare the floor, choose the right stain, apply the stain in thin coats, work in small sections, and maintain the applicator. With these tips, you'll be well on your way to creating a beautiful, long-lasting finish that will enhance the look and feel of any room.
Gallery of Floor Stain Applicator


Frequently Asked Questions
What is the best type of floor stain to use?
+The best type of floor stain to use depends on the type of wood and the desired color. Oil-based stains are great for hardwood floors, while water-based stains are better suited for softwood floors.
How do I maintain my floor stain applicator?
+To maintain your floor stain applicator, clean it with soap and water after each use, and allow it to dry thoroughly. Store the applicator in a dry, protected area to prevent damage.
Can I use a floor stain applicator on any type of floor?
+No, floor stain applicators are designed for use on wood floors only. Using a floor stain applicator on other types of floors, such as tile or concrete, can damage the floor and the applicator.
