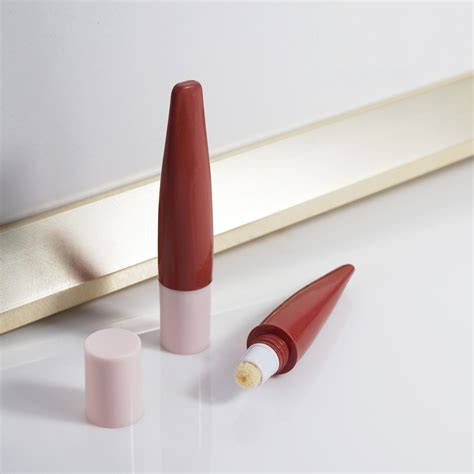
Applying eye shadow can be a daunting task, especially for those who are new to the world of makeup. However, with the right tools and techniques, achieving a flawless eye shadow look can be a breeze. One of the most versatile and user-friendly tools for applying eye shadow is the sponge tip applicator. In this article, we will explore five ways to apply eye shadow with sponge tip applicators, making it easier for you to enhance your natural beauty.
The Importance of Sponge Tip Applicators
Sponge tip applicators are small, sponge-like tips that are attached to a stick or handle. They are designed to pick up and apply eye shadow with precision and ease. These applicators are great for applying eye shadow to the eyelid, crease, and outer corner of the eye. They are also excellent for creating a seamless blend between colors.
Why Use Sponge Tip Applicators?
There are several reasons why sponge tip applicators are a must-have in any makeup bag. Here are a few:
- Precision: Sponge tip applicators allow for precise application of eye shadow, making it easier to create a flawless look.
- Ease of use: These applicators are easy to use, even for those who are new to makeup.
- Versatility: Sponge tip applicators can be used to apply eye shadow to various areas of the eye, including the eyelid, crease, and outer corner.
- Blendability: These applicators are great for blending eye shadow colors together, creating a seamless look.
5 Ways to Apply Eye Shadow with Sponge Tip Applicators
1. Applying Eye Shadow to the Eyelid

To apply eye shadow to the eyelid using a sponge tip applicator, follow these steps:
- Dip the sponge tip applicator into the eye shadow and tap off any excess powder.
- Place the applicator on the eyelid, starting from the inner corner and working your way outward.
- Gently sweep the applicator across the eyelid, applying the eye shadow in a smooth, even motion.
- Repeat the process until you achieve the desired level of coverage.
2. Creating a Seamless Blend

To create a seamless blend between eye shadow colors using a sponge tip applicator, follow these steps:
- Dip the sponge tip applicator into the eye shadow and tap off any excess powder.
- Place the applicator on the eyelid, starting from the inner corner and working your way outward.
- Gently sweep the applicator across the eyelid, applying the eye shadow in a smooth, even motion.
- Use a light touch to blend the colors together, feathering the edges of the eye shadow.
- Repeat the process until you achieve the desired level of blending.
3. Applying Eye Shadow to the Crease

To apply eye shadow to the crease using a sponge tip applicator, follow these steps:
- Dip the sponge tip applicator into the eye shadow and tap off any excess powder.
- Place the applicator on the crease, starting from the outer corner and working your way inward.
- Gently sweep the applicator across the crease, applying the eye shadow in a smooth, even motion.
- Use a light touch to blend the colors together, feathering the edges of the eye shadow.
- Repeat the process until you achieve the desired level of coverage.
4. Applying Eye Shadow to the Outer Corner

To apply eye shadow to the outer corner using a sponge tip applicator, follow these steps:
- Dip the sponge tip applicator into the eye shadow and tap off any excess powder.
- Place the applicator on the outer corner, starting from the lash line and working your way upward.
- Gently sweep the applicator across the outer corner, applying the eye shadow in a smooth, even motion.
- Use a light touch to blend the colors together, feathering the edges of the eye shadow.
- Repeat the process until you achieve the desired level of coverage.
5. Creating a Smoky Eye

To create a smoky eye using a sponge tip applicator, follow these steps:
- Dip the sponge tip applicator into the eye shadow and tap off any excess powder.
- Place the applicator on the eyelid, starting from the inner corner and working your way outward.
- Gently sweep the applicator across the eyelid, applying the eye shadow in a smooth, even motion.
- Use a light touch to blend the colors together, feathering the edges of the eye shadow.
- Repeat the process until you achieve the desired level of coverage.
- To add depth to the smoky eye, apply a darker shade of eye shadow to the crease and outer corner.
Gallery of Eye Shadow Looks


FAQs
What is the best way to apply eye shadow?
+The best way to apply eye shadow is to use a sponge tip applicator. This allows for precise application and blending of the eye shadow.
How do I blend eye shadow colors together?
+To blend eye shadow colors together, use a light touch and gently sweep the sponge tip applicator across the eyelid. Feather the edges of the eye shadow to create a seamless blend.
Can I use a sponge tip applicator to apply eye shadow to the crease?
+Yes, you can use a sponge tip applicator to apply eye shadow to the crease. Simply dip the applicator into the eye shadow and tap off any excess powder. Then, place the applicator on the crease and gently sweep it across the area.
We hope this article has helped you to learn more about applying eye shadow with sponge tip applicators. Remember to always use a light touch and to blend the colors together for a seamless look. With practice, you'll be a pro at applying eye shadow in no time!
