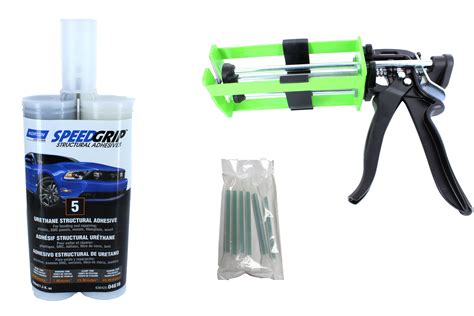
The world of epoxy application can be a daunting one, especially for those who are new to this type of project. With so many different tools and techniques available, it can be difficult to know where to start. One of the most essential tools for any epoxy project is an epoxy applicator. In this article, we will explore the world of epoxy applicators and provide you with five essential tips for using one.
What is an Epoxy Applicator?
Before we dive into our tips, let's take a quick look at what an epoxy applicator is and how it works. An epoxy applicator is a tool used to apply epoxy resin to a surface. It is typically a handheld device that consists of a container for the epoxy, a mixing chamber, and a nozzle or applicator tip.

Tip 1: Choose the Right Applicator for Your Project
With so many different epoxy applicators available, it can be difficult to choose the right one for your project. When selecting an applicator, consider the size of your project, the type of epoxy you are using, and the desired finish. For small projects, a manual applicator may be sufficient, while larger projects may require a more heavy-duty applicator.
Types of Epoxy Applicators
- Manual Applicators: These are the most basic type of applicator and are suitable for small projects.
- Pneumatic Applicators: These applicators use compressed air to dispense the epoxy and are ideal for larger projects.
- Electric Applicators: These applicators use a motor to dispense the epoxy and are perfect for high-volume projects.

Tip 2: Prepare Your Surface
Before applying epoxy, it is essential to prepare your surface. This includes cleaning the surface, removing any imperfections, and applying a primer if necessary. A well-prepared surface will ensure a strong bond between the epoxy and the surface.
Surface Preparation Tips
- Clean the surface thoroughly with a degreaser and a lint-free cloth.
- Remove any imperfections, such as cracks or holes, with a patching compound.
- Apply a primer if necessary, following the manufacturer's instructions.

Tip 3: Mix Your Epoxy Correctly
Mixing your epoxy correctly is crucial for a successful project. Make sure to follow the manufacturer's instructions for mixing the epoxy, and use a mixing cup and stick to ensure a thorough mix.
Mixing Tips
- Use a mixing cup and stick to ensure a thorough mix.
- Follow the manufacturer's instructions for mixing the epoxy.
- Mix the epoxy in a well-ventilated area, away from any ignition sources.

Tip 4: Apply the Epoxy Correctly
Applying the epoxy correctly is just as important as mixing it correctly. Use a steady, consistent motion to apply the epoxy, and make sure to cover the entire surface.
Application Tips
- Use a steady, consistent motion to apply the epoxy.
- Make sure to cover the entire surface.
- Use a credit card or similar tool to remove any air bubbles or excess epoxy.

Tip 5: Allow the Epoxy to Cure
Finally, make sure to allow the epoxy to cure for the recommended amount of time. This will ensure a strong, durable bond between the epoxy and the surface.
Curing Tips
- Follow the manufacturer's instructions for curing times.
- Keep the epoxy away from any ignition sources or heat.
- Use a thermometer to ensure the epoxy has reached the recommended temperature.

Gallery of Epoxy Applicators


What is an epoxy applicator?
+An epoxy applicator is a tool used to apply epoxy resin to a surface.
What are the different types of epoxy applicators?
+There are three main types of epoxy applicators: manual, pneumatic, and electric.
How do I choose the right epoxy applicator for my project?
+Consider the size of your project, the type of epoxy you are using, and the desired finish when choosing an epoxy applicator.
By following these five essential tips, you can ensure a successful epoxy project and achieve a strong, durable bond between the epoxy and the surface. Remember to choose the right applicator for your project, prepare your surface, mix your epoxy correctly, apply the epoxy correctly, and allow the epoxy to cure. Happy crafting!
