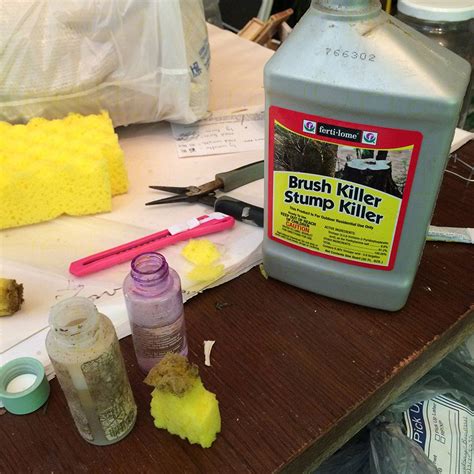
Weeds can be a frustrating and persistent problem for many gardeners and homeowners. They can choke out desired plants, create unsightly landscapes, and even harbor pests and diseases. One effective way to control weeds is by using a targeted herbicide application. In this article, we will explore a DIY herbicide sponge applicator that can help you tackle weeds with precision and ease.
Understanding Weeds and Herbicides
Before we dive into the DIY project, it's essential to understand the basics of weeds and herbicides. Weeds are plants that grow in areas where they are not wanted, often competing with desired plants for water, nutrients, and light. Herbicides are chemicals that kill or inhibit the growth of plants, including weeds.
There are two main types of herbicides: selective and non-selective. Selective herbicides target specific types of plants, while non-selective herbicides kill all plants they come into contact with. When using herbicides, it's crucial to choose the right type and follow the instructions carefully to avoid harming desirable plants or the environment.
The Benefits of a DIY Herbicide Sponge Applicator
A DIY herbicide sponge applicator offers several benefits over traditional herbicide application methods. These benefits include:
- Precision application: A sponge applicator allows you to target specific weeds without overspray or drift onto desirable plants.
- Reduced chemical usage: By applying herbicide directly to the weeds, you can use less chemical overall, reducing the environmental impact and saving money.
- Increased effectiveness: A sponge applicator can help you apply the herbicide directly to the leaves and stems of the weeds, increasing the effectiveness of the treatment.
Materials Needed
To create a DIY herbicide sponge applicator, you will need the following materials:
- A large, sturdy sponge (preferably with a long handle)
- A container or bucket with a lid
- Herbicide ( choose the right type for your needs)
- Water
- A measuring cup or jug
- A spray bottle or watering can (optional)

Instructions
To create your DIY herbicide sponge applicator, follow these steps:
- Prepare the herbicide solution: Mix the herbicide with water according to the manufacturer's instructions. Make sure to wear protective gloves and eyewear when handling herbicides.
- Soak the sponge: Dip the sponge into the herbicide solution, making sure to saturate it thoroughly.
- Apply the herbicide: Use the sponge to apply the herbicide directly to the weeds. Make sure to cover all the leaves and stems of the weeds.
- Repeat as necessary: Depending on the type of weeds and herbicide, you may need to repeat the application process several times to achieve the desired results.
**Tips and Precautions**
When using a DIY herbicide sponge applicator, keep the following tips and precautions in mind:
- Always read the label: Before using any herbicide, make sure to read the label carefully and follow the instructions.
- Wear protective gear: Wear protective gloves, eyewear, and clothing when handling herbicides to avoid skin contact and exposure.
- Avoid overspray: Be careful not to overspray or drift the herbicide onto desirable plants or other areas.
- Use the right herbicide: Choose the right type of herbicide for your needs, and make sure to use it at the right time of year.
**Common Mistakes to Avoid**
When using a DIY herbicide sponge applicator, avoid the following common mistakes:
- Using too much herbicide: Using too much herbicide can harm desirable plants and the environment. Always follow the manufacturer's instructions and use the minimum amount necessary.
- Not waiting long enough: Not waiting long enough between applications can reduce the effectiveness of the treatment. Make sure to follow the manufacturer's instructions for reapplication.
- Not targeting the right weeds: Make sure to target the right type of weeds with the right type of herbicide. Using the wrong herbicide can reduce the effectiveness of the treatment.

Conclusion
A DIY herbicide sponge applicator is a simple and effective way to control weeds in your garden or yard. By following the instructions and tips outlined in this article, you can create your own sponge applicator and start tackling those pesky weeds today. Remember to always read the label, wear protective gear, and use the right herbicide for your needs.
Gallery


FAQ
What is the best type of herbicide for my needs?
+The best type of herbicide for your needs depends on the type of weeds you are trying to control, the type of plants you want to protect, and the time of year. Always read the label and follow the manufacturer's instructions.
How often should I reapply the herbicide?
+The frequency of reapplication depends on the type of herbicide and the type of weeds you are trying to control. Always follow the manufacturer's instructions for reapplication.
What are some common mistakes to avoid when using a DIY herbicide sponge applicator?
+Common mistakes to avoid include using too much herbicide, not waiting long enough between applications, and not targeting the right type of weeds. Always read the label and follow the manufacturer's instructions.
