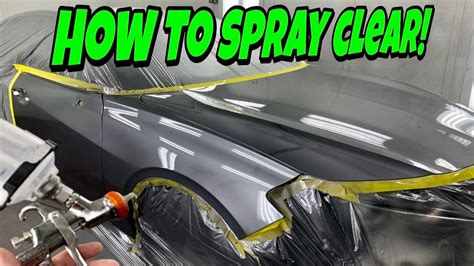
Clearcoat is a crucial component of any paint job, providing a glossy, protective finish that enhances the appearance of your vehicle. However, achieving a perfect clearcoat application can be challenging, even for experienced painters. In this article, we'll provide you with 7 tips to help you achieve a flawless clearcoat finish.
The importance of a perfect clearcoat application cannot be overstated. A well-applied clearcoat not only protects the underlying paint from the elements but also gives your vehicle a showroom shine. On the other hand, a poorly applied clearcoat can lead to a dull, orange-peeled finish that detracts from the overall appearance of your vehicle.

Fortunately, with the right techniques and a bit of practice, anyone can achieve a perfect clearcoat application. Here are 7 tips to get you started:
Tip 1: Prepare the Surface
Before applying clearcoat, it's essential to ensure that the surface is properly prepared. This includes sanding the paint to create a smooth, even finish and removing any dust, dirt, or other contaminants that may be present.
The Importance of Sanding
Sanding is a critical step in the clearcoat application process. It helps to create a smooth, even finish and ensures that the clearcoat adheres properly to the paint. When sanding, be sure to use a high-quality sandpaper and work your way up to a fine grit (1200-1500) to achieve the best results.

Tip 2: Choose the Right Clearcoat
With so many clearcoats on the market, it can be difficult to choose the right one for your project. When selecting a clearcoat, consider the type of paint you're using, the ambient temperature and humidity, and the level of gloss you desire.
Types of Clearcoat
There are several types of clearcoat available, each with its own unique characteristics and benefits. Some of the most common types of clearcoat include:
- Urethane clearcoat: A popular choice for automotive applications, urethane clearcoat is known for its high gloss and durability.
- Acrylic clearcoat: A water-based clearcoat that's easy to apply and dries quickly.
- Ceramic clearcoat: A high-performance clearcoat that provides excellent durability and resistance to the elements.

Tip 3: Apply the Clearcoat in Thin Coats
Applying clearcoat in thin coats is essential to achieving a smooth, even finish. Thin coats help to prevent the clearcoat from pooling or running, which can lead to a rough, uneven finish.
The Benefits of Thin Coats
Applying clearcoat in thin coats offers several benefits, including:
- Improved flow and leveling
- Reduced risk of pooling or running
- Easier to achieve a smooth, even finish

Tip 4: Use a High-Volume, Low-Pressure (HVLP) Gun
A high-volume, low-pressure (HVLP) gun is a type of paint gun that's designed to produce a smooth, even finish. HVLP guns are ideal for clearcoat application because they provide a high volume of paint at a low pressure, which helps to prevent the clearcoat from becoming too thick and difficult to work with.
The Benefits of HVLP Guns
HVLP guns offer several benefits, including:
- Smooth, even finish
- Reduced risk of orange peel
- Easy to achieve a high-gloss finish

Tip 5: Work in a Clean, Dust-Free Environment
A clean, dust-free environment is essential for achieving a perfect clearcoat finish. Dust and other contaminants can settle on the surface of the paint and cause imperfections in the clearcoat.
The Importance of a Clean Environment
A clean environment is critical for achieving a perfect clearcoat finish. When working in a clean environment, you can be sure that your clearcoat will be free from imperfections and will provide a smooth, even finish.

Tip 6: Avoid Applying Clearcoat in Direct Sunlight
Direct sunlight can cause the clearcoat to dry too quickly, which can lead to a rough, uneven finish. When applying clearcoat, it's best to work in a shaded area or use a canopy to block direct sunlight.
The Risks of Direct Sunlight
Direct sunlight can cause several problems when applying clearcoat, including:
- Rapid drying, which can lead to a rough finish
- Increased risk of orange peel
- Difficulty achieving a smooth, even finish

Tip 7: Use a UV Stabilizer to Prevent Yellowing
UV stabilizers are additives that can be mixed with clearcoat to prevent yellowing and discoloration. When choosing a UV stabilizer, be sure to select one that's compatible with your clearcoat and follow the manufacturer's instructions for use.
The Benefits of UV Stabilizers
UV stabilizers offer several benefits, including:
- Prevention of yellowing and discoloration
- Improved durability and resistance to the elements
- Easy to use and mix with clearcoat

By following these 7 tips, you can achieve a perfect clearcoat finish that will enhance the appearance of your vehicle and provide long-lasting protection against the elements.
Gallery of Clearcoat Application:


FAQ Section:
What is the best way to apply clearcoat?
+The best way to apply clearcoat is in thin coats, using a high-volume, low-pressure (HVLP) gun, and working in a clean, dust-free environment.
How do I prevent yellowing and discoloration in my clearcoat?
+Using a UV stabilizer can help prevent yellowing and discoloration in your clearcoat. Be sure to choose a UV stabilizer that's compatible with your clearcoat and follow the manufacturer's instructions for use.
What is the best type of clearcoat to use for my project?
+The best type of clearcoat to use for your project will depend on the type of paint you're using, the ambient temperature and humidity, and the level of gloss you desire. Some common types of clearcoat include urethane, acrylic, and ceramic.
