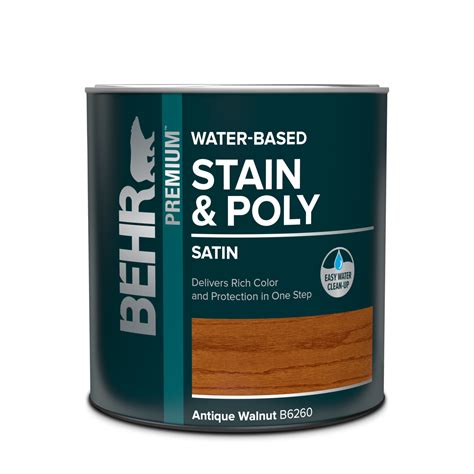
Applying Behr stain to your deck, fence, or other wooden surfaces can be a great way to protect and enhance the appearance of the wood. However, achieving a perfect finish requires some planning, preparation, and attention to detail. In this article, we will guide you through the 5 steps to perfect Behr stain application.
The importance of proper stain application cannot be overstated. A well-applied stain can provide years of protection against the elements, while a poorly applied stain can lead to premature fading, cracking, and damage to the wood. By following these 5 steps, you can ensure a professional-looking finish that will last for years to come.

Step 1: Prepare the Surface
Before applying Behr stain, it's essential to prepare the surface properly. This includes cleaning the wood to remove dirt, grime, and other substances that may interfere with the stain's adhesion.
Use a high-quality wood cleaner and a soft-bristled brush to scrub the surface. Be sure to follow the manufacturer's instructions for the cleaner and take necessary safety precautions to avoid injury or damage.
Once the wood is clean, use a wood brightener to restore its natural color and texture. This step is especially important if the wood has been exposed to the elements for an extended period.

Tips for Surface Preparation
- Always read and follow the manufacturer's instructions for the wood cleaner and brightener.
- Use a soft-bristled brush to avoid damaging the wood.
- Work in a well-ventilated area and avoid applying the cleaner or brightener in direct sunlight.
Step 2: Choose the Right Stain
With so many different types of Behr stain available, choosing the right one for your project can be overwhelming. However, by considering a few key factors, you can select the perfect stain for your needs.
First, consider the color and finish you want to achieve. Behr offers a wide range of colors and finishes, from transparent to semi-solid.
Next, think about the level of protection you need. If you're applying the stain to a deck or fence that will be exposed to heavy foot traffic or harsh weather conditions, you may want to choose a stain with added protection.
Finally, consider the type of wood you're working with. Different types of wood may require special stain formulas to achieve the desired results.

Tips for Choosing the Right Stain
- Always read the label and follow the manufacturer's instructions.
- Consider the color, finish, and level of protection you need.
- Choose a stain that is specifically formulated for your type of wood.
Step 3: Apply the Stain
Now that you've prepared the surface and chosen the right stain, it's time to apply it. This is the most critical step in the process, and it requires attention to detail and patience.
Start by applying the stain to a small test area to ensure the desired color and finish. Once you're satisfied with the results, begin applying the stain to the entire surface.
Use a high-quality brush or roller to apply the stain, working in small sections to maintain even coverage. Be sure to follow the manufacturer's instructions for application and drying times.

Tips for Applying the Stain
- Always read and follow the manufacturer's instructions.
- Apply the stain in small sections to maintain even coverage.
- Use a high-quality brush or roller to ensure a smooth finish.
Step 4: Allow the Stain to Dry
After applying the stain, it's essential to allow it to dry completely before moving on to the next step. This can take anywhere from a few hours to several days, depending on the type of stain and environmental conditions.
During this time, avoid exposing the stained surface to direct sunlight, moisture, or heavy foot traffic. This can cause the stain to fade or become damaged.
Once the stain is dry, use a clean cloth to wipe away any excess stain and smooth out the finish.

Tips for Allowing the Stain to Dry
- Always follow the manufacturer's instructions for drying times.
- Avoid exposing the stained surface to direct sunlight, moisture, or heavy foot traffic.
- Use a clean cloth to wipe away any excess stain and smooth out the finish.
Step 5: Seal the Stain (Optional)
Finally, if desired, you can apply a clear sealant to protect the stain and extend its lifespan. This step is optional but highly recommended, especially if you're applying the stain to a high-traffic area or exposed to harsh weather conditions.
Choose a high-quality clear sealant that is specifically designed for use with Behr stain. Apply the sealant according to the manufacturer's instructions, following the same application and drying times as the stain.

Tips for Sealing the Stain
- Choose a high-quality clear sealant specifically designed for use with Behr stain.
- Follow the manufacturer's instructions for application and drying times.
- Apply the sealant in small sections to maintain even coverage.


What is the best way to apply Behr stain?
+The best way to apply Behr stain is to follow the manufacturer's instructions and use a high-quality brush or roller. Apply the stain in small sections to maintain even coverage.
How long does Behr stain take to dry?
+Behr stain typically takes anywhere from a few hours to several days to dry, depending on the type of stain and environmental conditions. Always follow the manufacturer's instructions for drying times.
Do I need to seal my Behr stain?
+Sealing your Behr stain is optional but highly recommended, especially if you're applying the stain to a high-traffic area or exposed to harsh weather conditions. Choose a high-quality clear sealant specifically designed for use with Behr stain.
By following these 5 steps to perfect Behr stain application, you can achieve a professional-looking finish that will last for years to come. Remember to always read and follow the manufacturer's instructions, and take necessary safety precautions to avoid injury or damage.
